Double exposure used to mean a film camera, a patient friend and a lot of wasted rolls. Now a good Gemini double exposure photo prompt gets you the same dreamy “landscape inside a face” look in about a minute. I spent an evening testing it on portraits, and most of my first results were bad.
The faces came out too dark, the scenery looked pasted on, or the background turned grey instead of clean white. Below are the fixes that worked, two templates I ran myself, and the mistakes to avoid.
What makes a double exposure photo work
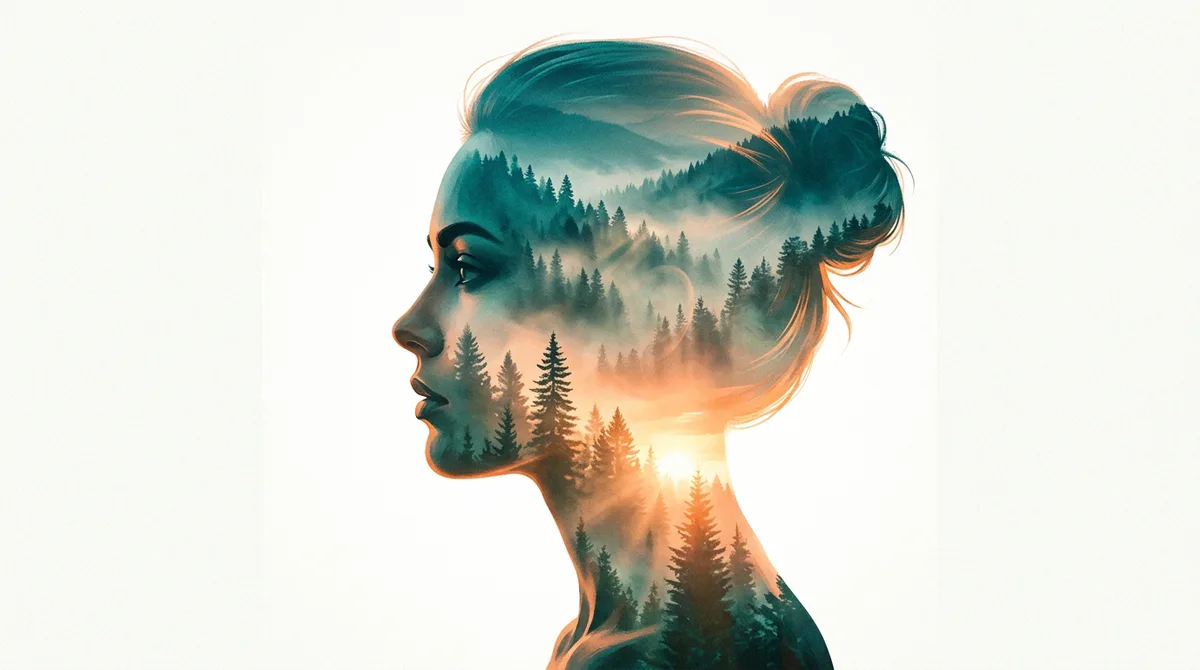
A double exposure is two images merged into one. The first is a silhouette, usually a face in profile. The second is a scene that shows only inside that silhouette. The magic is the contrast: a bright, empty background around a rich, detailed shape.
Gemini does not “layer” two pictures the way Photoshop does. It repaints the whole image from your description. So you have to describe three things clearly: the outline, what lives inside it, and what the background should be.
- Outline: side profile, head and shoulders, facing left or right.
- Inside scene: one landscape or landmark, with a time of day.
- Background: “pure white” or “soft cream”. Without this, you get a murky grey.
If you want the result to still look like you, the face rule matters just as much. I covered that in my guide on keeping the face the same in Gemini.
The master Gemini double exposure photo prompt
Upload a clear side-profile photo, or skip the upload and describe a person. Then paste this and fill the brackets:
Prompt: Create a double exposure portrait. Use the person’s side profile as a clean silhouette, facing [left / right], head and shoulders. Inside the silhouette, blend [your scene] at [golden hour / dawn / blue hour] so it fades smoothly into the face and hair. Keep the facial features visible at the edge. Pure white background, soft [warm amber / teal and orange / pastel] colour palette, fine film grain. No text, no watermark.
The line “keep the facial features visible at the edge” is the one I added after three failed tries. Without it, the scenery swallowed the nose and lips, and the portrait stopped looking like a person.
Example 1: Hampi at golden hour inside a profile
I wanted a Karnataka scene, so I picked the stone chariot and the boulder hills of Hampi. Boulders have strong shapes, so they read clearly even inside a small silhouette.
Prompt used: Double exposure portrait: side profile silhouette of a young Indian man, inside the silhouette a golden-hour view of the Hampi stone chariot and boulder landscape, blended smoothly, pure white background, warm amber tones, fine grain. No text, no watermark.
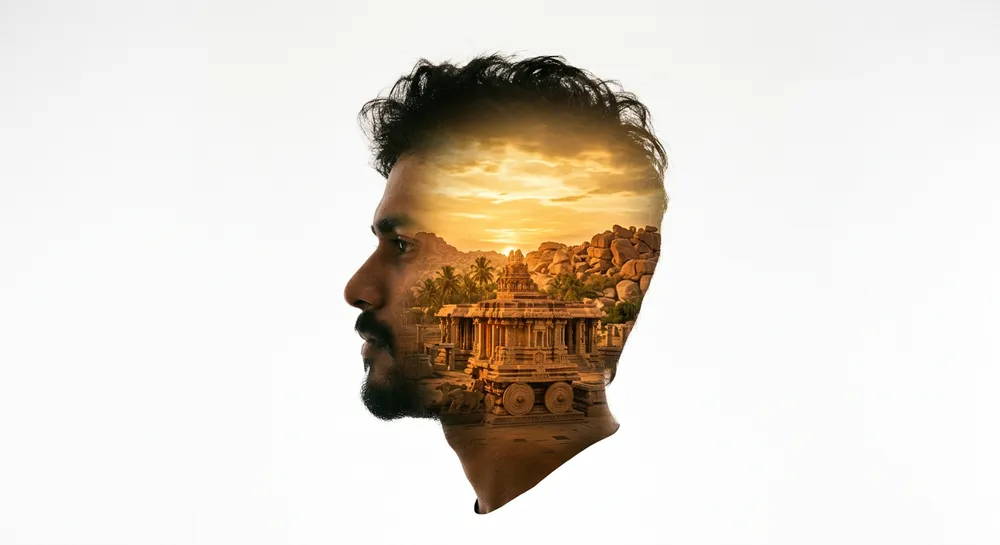
Two things helped here. “Golden-hour” warmed the sky inside the head, and “warm amber tones” kept the white background from turning yellow. When I asked for “colourful” instead, the scene turned into a busy rainbow.
Example 2: Marigolds and a temple tower in a saree portrait
This one suits festival photos. I kept the shoulders and saree in the frame so the double exposure continues down the body.
Prompt used: Double exposure portrait: side profile silhouette of a woman in a silk saree with jasmine in her hair, inside the silhouette a blooming marigold field and a temple gopuram at dawn, blended smoothly, pure white background, soft pastel orange and magenta. No text, no watermark.
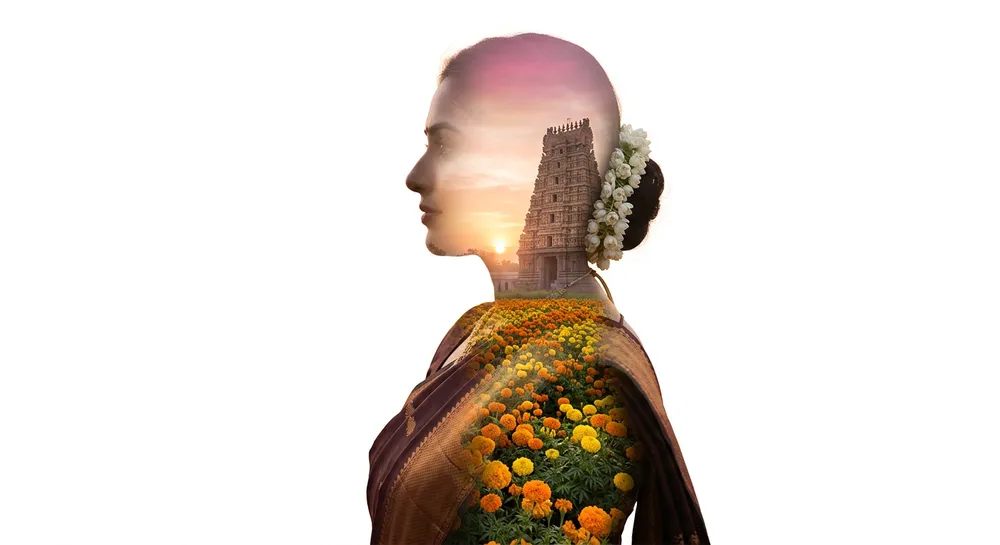
The marigold field fills the saree nicely, and the gopuram sits in the head area. Naming real flowers and a real kind of building gave far better detail than “Indian nature scene”, which gave me generic palms. If you like festival looks, try the same idea with my saree photo prompt.
Scenes that blend well (and ones that do not)
Not every scene survives being squeezed into a head. These are the ones that worked for me:
- Mountains and misty forests. Soft layers fade naturally. This is what I used for the cover image of this post.
- Single landmarks. One temple, one tower, one palace. Not a whole city.
- Flower fields and sunsets. Big colour areas blend without fuss.
And the ones that struggled: crowded markets, many small objects, and anything with fine text or signboards. They turn into noise at that size.
Fixing the common problems
The background is grey, not white
Say “pure white background, no shadows, no gradient”. If it still tints, follow up with “make the background pure white only”.
The face disappears into the scenery
Add “keep the nose, lips and eye clearly visible” and lower the strength with “subtle blend inside the head only”.
The silhouette is facing the camera
Be blunt: “strict side profile, facing left”. Gemini often drifts to a three-quarter view unless you say so, and a double exposure looks weak that way.
Two different faces appear
This happens when you upload a photo and also describe a person. Do one or the other. If you upload, say “use this person only”.
Common mistakes I made first
- Asking for several scenes at once. One scene per portrait.
- Using a front-facing selfie. A real side-profile photo gives a much cleaner outline.
- Forgetting “no text, no watermark”. Gemini sometimes adds a fake signature.
- Posting the first result. I usually regenerate twice and pick the best.
Google’s own guidance for its image model also says to describe the scene and style specifically instead of using vague words. It is in the official Nano Banana tips from Google. For writing prompts in general, see how to write AI image prompts.
My four-step workflow
- Pick the scene first. If I cannot picture it inside a head in one second, I change it.
- Run the master prompt once and look only at the edge of the face, not the scenery.
- Fix one thing per follow-up, for example “make the background pure white” or “show the lips more clearly”. Changing three things at once made Gemini redo the whole image.
- Save the winner and, if you want a poster, crop it to a square or 4:5 in any editor.
This order saved me a lot of retries. The scene choice decides about 70 percent of the result, so spend your time there.
Wrap-up
A good Gemini double exposure photo prompt is mostly about being specific. Describe the outline, the one scene inside it, and the white background, and Gemini does the rest. Start with the master prompt, swap in a scene from your own town, and keep the face visible. Share the best one with a friend; it makes a great profile picture.
FAQ
Is Gemini free for double exposure photos?
Image generation is available in the free Gemini app, but daily limits apply and can change. Check the app for your current limit.
Can I use my own photo?
Yes. Upload a clear side-profile photo and tell Gemini to keep the person’s face the same.
Which scenes look best inside the silhouette?
Misty mountains, a single landmark, flower fields and sunsets. Avoid crowded scenes.
How do I get a white background?
Write “pure white background, no shadows, no gradient” in the prompt, and ask for it again in a follow-up if needed.